Sunday, May 29, 2011

Happy Memorial Day from our house to yours!


MENU:
Baked Beans

Grandma's drink, Cranberry Apple.  It looked so pretty and festive, I just had to take a picture of it.

I told them not to pose, so they didn't :)

On the other hand, Ashee decided to pose.  She's such a ham.

Dessert time.  This is the Hershey Chocolate Mousse Pie mentioned above (along with the link to the recipe).  Elise made this for us once again and it's always a favorite!

Patriotic Berry Trifle (mentioned above along with a link to the recipe)


Please visit my Military Tribute Wall in honor of all the men in my family who have served above and beyond.  How can we ever thank them enough??

Patriotic Berry Trifle

by Sunny Anderson

1/4 cup plus 2/3 cup sugar
1/4 cup Limoncello or fresh lemon juice
1/4 tsp. almond extract
1 premade angel food cake, cut into 1-inch slices
1 pound cream cheese, at room temperature
2 cups heavy cream, at room temperature
2 pints blueberries
2 pints strawberries, hulled and sliced

Heat 1/4 cup sugar, the Limencello or lemon juice and 1/4 cup water in a saucepan over medium-high heat, stirring, until the sugar dissolves.  Remove from the heat and stir in the almond extract (sorry, I completely forgot to take a picture of this part).

Brush both sides of each slice of cake with the syrup.  Cut the slices into 1-inch cubes.

Beat the remaining 2/3 cup sugar and the cream cheese with a mixer on medium-speed until smooth and light.  Add the cream and beat on medium-high speed until smooth and the consistency of whipped cream.

Arrange half of the cake cubes in the bottom of a 13-cup trifle dish.

Sprinkle evenly with a layer of blueberries.

Dollop* half of the cream mixture over the blueberries and gently spread.

Top with a layer of strawberries

Layer the remaining cake cubes on top of the strawberries, then sprinkle with more blueberries.

Top with remaining cream mixture.  Finish with the remaining strawberries and blueberries, arranging them in a decorative pattern.  Cover and refrigerate 1 hour.


I looked on the FOODTV website for a patriotic dessert and this was the first picture that popped up.  I was so thrilled as I didn't have to spend hours looking for that perfect recipe as it seems I sometimes do.  Not only did it look delicious and pretty but it was also so simple.  Sunny did not add the Limoncello, instead I did.  I used the Limoncello for another trifle I made a couple of months ago, I figured that it wouldn't hurt to use it for this one and it came out perfect!  *I don't understand why she said to have the heavy cream at room temperature.  I have always learned that the cream needed to be well chilled in order for it to turn into whipping cream.  I was very reluctant but I followed the recipe hoping it would turn out perfect.......well it didnt'!  Just as I thought.  I think I had it mixing in my mixer for at least 10 minutes and it never "peaked".  I even at cream of tartar, it may have helped a teensy bit but still not enough, my whipping cream was lame and liquidy.  I was so upset but I had no choice and had to use it the way it was.  When it was time for dessert, it had set and thickened a little bit while in the refrigerator but overall, the flavors were perfect.  It's a great tasting dessert and hours later when hubby and I had another serving, the cream had thickened even more.  The angel cake had also soaked up the berry juices and the Limoncello syrup, MERCY!!!  Mmmm,  I LOVE SUMMER TIME!!!!

I partied at:
Tempt my Tummy Tuesdays


  Photobucket
It's a Blog Party

This recipe was featured on:


Grilled Cornell Chicken - My Way

(Printable R

1 pkg. of 10-12 chicken legs
2 cups apple cider vinegar
1 egg
1 stick of butter, softened
1/2 cup of EVOO
1 tbsp. poultry seasoning
3 tablespoons Kosher salt
1 tsp. pepper
paper towels

Dab each chicken leg with a paper towel or two.  Set aside.

As they come to room temperature, the chicken pieces will be "sweating" so keep dabbing with a dry paper towel.

In the meantime, in a medium size mixing bowl, mix the butter and the oil.

Add the apple cider and the egg and mix thoroughly

add the secret ingredient, uh-ehr the dry poultry seasoning.

Stir thoroughly.  Add salt & pepper to taste.

Add enough of the sauce to cover the bottom of a marinating tray.  Notice how this container has a multitude of raised peaks in order to let the sauce to get under the meat, even as it sets for hours.  If you don't have one......get one!  (I've had this one for decades(?) - I bought if from Tupperware and I'd be lost without it.

Add the chicken and then use enough sauce to almost cover the chicken legs.

Look at my lovely babies marinating in the sauce and soaking up so much deliciousness.  The neat trick about this container is that I can flip it upside down as the inside of the top also contains the little raised peaks. Let marinate for an hour (do not refrigerate) or marinate in the refrigerator over night (bring to room temp. before you grill them though) flipping several times.

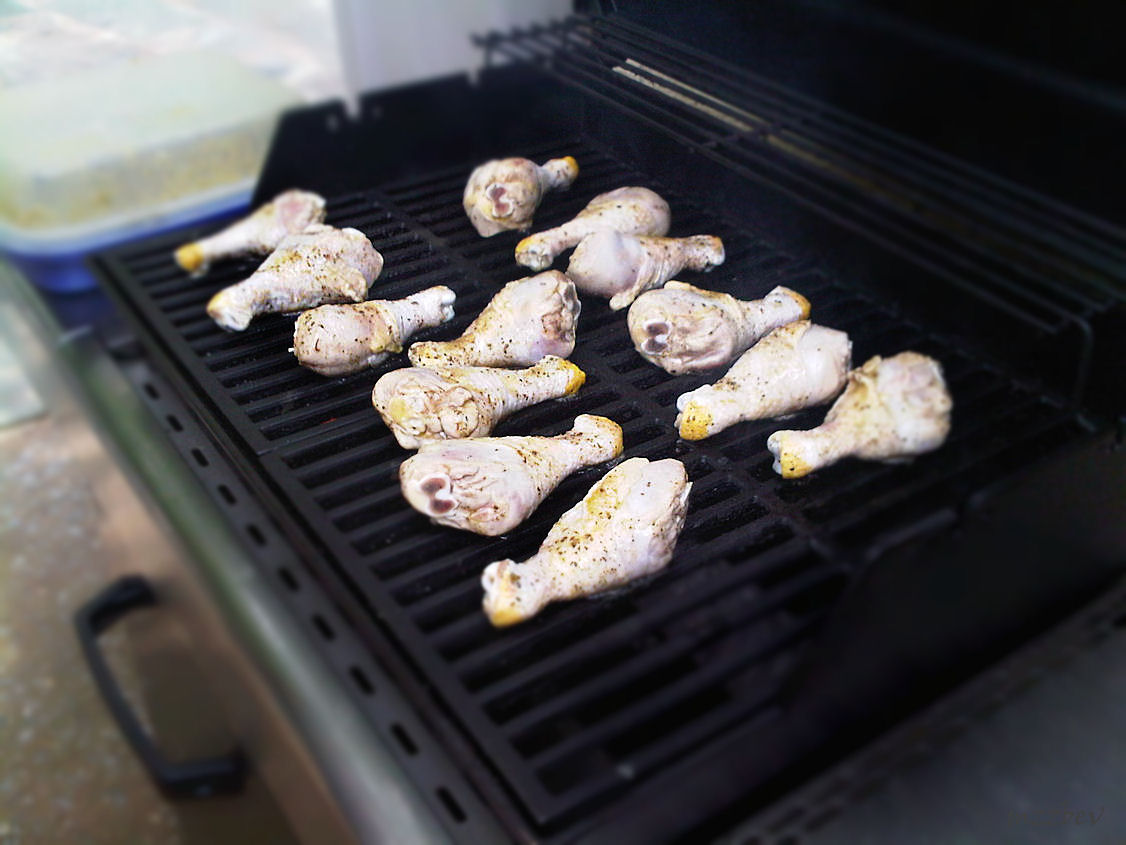
When ready to grill, place on a hot grill, turned down to med heat.  Use marinating sauce to baste often.  Cook low and slow, I know that's hard, at least at my house it is, Hubby starts getting ravenous about this time.

Flip only once - I learned that tip on "Grilling Week" on the Martha Stewart radio show on Sirius.  I learned lots of grilling tips this past week.

I have been eating Cornell Chicken since the first Summer I spent in upstate New York, which was almost 30 years ago.  My hubby and I were still newlyweds and we spent our vacation with family just below Ithaca, NY - where Cornell Univ., is located.   At first I thought that those gringos in upstate New York forgot to put the Hunts BBQ sauce on their barbecue but then when I tasted the pale - plain looking chicken it was quite the opposite!  I never experienced all the flavors that were roaming around in my mouth.  I couldn't get enough of it, it was sooooo good.  A couple of years later, my mother-in-law sent us the recipe, I'm not sure how she found it but we've been using it ever since.  So, please, I beg of you, try this sauce at least once this Summer and let me know how it faired.  Regarding the ingredients, the original sauce asked for a cup of oil and through the years I always thought it was a bit too "watery" so, this time I only added 1/2 cup of oil but I also added a stick of butter knowing it would help all the flavors stick to the meat instead of roll off.  Well.....drum roll please......IT WORKED!!!  WOW!!  I'm convinced it enhanced the flavors!  So amazing that  I'm keeping this recipe, that's why I added "My Way" to the end of the title.  Happy grilling!!!


I partied at:

and

Miz Helen’s Country Cottage


Pineapple Teriyaki Burgers


2 lbs. hamburger meat
1 can of crushed pineapples
1 egg
1/4-1/2 cup of dry bread crumbs
1 tsp. dry garlic
Salt & pepper
1 bottle of your favorite Teriyaki sauce (I'm using Wegmans brand)

Pour the can of crushed pineapples into a medium saucepan under medium heat.  Let simmer.

In the meantime, combine the meat, egg, dry garlic, bread crumbs, and  the salt and pepper.  I don't usually like to use my hands when combining burger meat but in this case, I just had to.  It's the only way to combine the ingredients thoroughly and completely.

As most of the liquid in the pineapples evaporates, add half a bottle of the Teriyaki sauce.  Stir and simmer once again until most of the liquid has evaporated once again.  Move away from heat and let set to cool.

Add a 1/4 cup of the Teriyaki sauce to the meat and once again, mix thoroughly and completely.  Then make six patties.

Place patties on a wax paper covered cookie sheet.  Make an indention in the middle of each patty.  The indention allows the patties to cook evenly - yes that's right, even Guy Fieri says so.....and if Guy does it, you can't go wrong!

Plus the indention serves as a reservoir for a scoop of the pineapple teriyaki sauce.

Take the patties to the grill.  Lay patties meat side down first, grill for about 7-10 minutes.  Turn patties over and dollop some more of the pineapple teriyaki sauce on top of each patty.  

Dab each patty with some of the leftover teriyaki sauce from the bottle.  Cook patties for another 7-10 minutes.

After you're done admiring these lovely patties......DIG IN!!!!

I got this idea a couple of weeks ago when my husband and I went to Red Robin for lunch.  It was such a good burger - the best I'd ever eaten so I knew I would have to go home and try to make it myself.  Not to brag, but they came out very good!  I might want to add a little less garlic powder next time as I felt if was a little to garlicky but other than that the garlic fit in with the Asian flavor from the teriyaki sauce.  I would have put in some fresh ginger if I had it but I didn't.  I'm still curious how that will taste with the ginger, so I'm going to have to make sure I have some on hand next time I make these burgers.  My hubby and grandma enjoyed  the burgers as I did too.


Related Posts Plugin for WordPress, Blogger...