Friday, December 6, 2013

DIY - Pine Branch Wreath

When you trim your live Christmas tree DON'T THROW AWAY THOSE REMNANTS!
Save them to make a Pine Branch Wreath.  Here's how,
Items needed:
Pine tree branches
Jute twine
Magnolia cones or Pine cones
Holly Berry branches with the berries
A bow
No glue is needed....that's right I said NO GLUE!

Here's the bunch our daughter gave us from her tree.  I was able to make a total of three wreaths out of this bunch.

Select three branches.  One large, one medium, one small.  Place the large one on the bottom, place the medium on top that one and then the small.

Cut some jute twine, about 2 ft. long.  Gather the branches at the top and wrap the twine around it once very tight and knot it.

Now wrap the rest of the twine in and around the branches staying as close to the original knot as possible.  Tie it up at the end and cut off any extra.  Set aside.

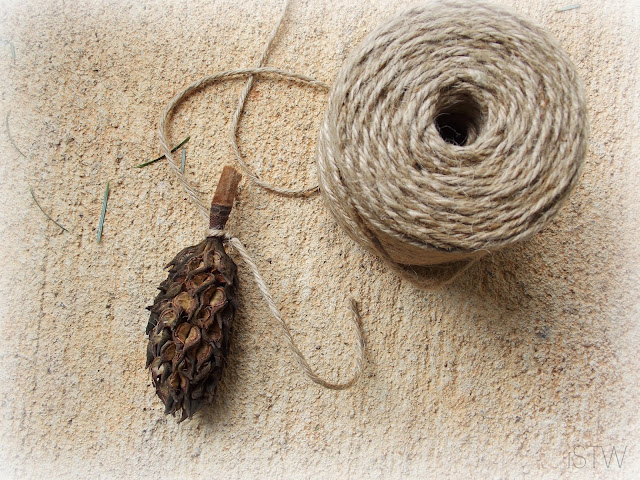
Cut off another 2 1/2 ft. long of jute twine.  Take the end of a Magnolia cone and tie a knot around the bottom of the stem.

Add two more cones to the same end.

Do the same with the other end so you'll have three cones on each end with about a 7-8"  gap in between.

Secure the strand of cones to the wreath by placing the string in and around the branch ends at the top

Give the cone strand a couple of twists for added security

You can add a bow to it.  This one we hung on our gate by using more twine.

This one I left plain and hung it from our light post out front

I added Holly Berry twigs to this one (ouch!!) and hung it on our railing by the front porch.

And that's it!  I had everything on hand so I didn't have to buy anything.  You can find a lot of things outside if you go look. The Magnolia Cones came from our Magnolia tree and the Holly Berry twigs, I snipped off our Holly Berry tree (I'm not sure if that's the official name).  Once the season is over, all I have to do is remove the string and throw the branches and cones into our compost heap except for the bow of course.  No glue was involved so that makes it safer for the environment too.

Hope you have fun making your own wreaths like I did and remember to savor every moment!

Share with:
FUNKYJUNKINTERIORS


Making it Real with Double Mint Squares


BATTER RECIPE
3/4 cup mint chocolate chips, melted
1 1/2 sticks butter, melted
1 cup sugar
3 large eggs
1/2 each vanilla extract and peppermint extract
1 1/3 cups all purpose flour
1 tsp. baking powder
8 drops green food coloring

Preheat oven to 350F degrees

Linea 9" square pan with foil allowing ends to extend on two sides fold under.  Coat foil with non-stick spray.

Melt 3/4 cup mint choc. chips in microwave for about 1 minute on high. Stir and cool slightly.

Pour the melted butter into a mixing bowl.  Whisk in the sugar and mix until creamy.  Add the eggs one at a time.  Add the extracts and mix.

Add the flour and baking powder until just blended.

Transfer the chocolate to a small mixing bowl.  Pour 1 1/4 cups batter until evenly tinted.

Spread evenly in prepared pan.

Stir green food coloring into remaining batter until evenly tinted.

and then this happened!. . . . yes, it fell..... face down

and this is what I did!  After a few minutes of this, I had no choice but to pick myself up, dust myself off and start all over again

After I scooped it up and used these babies to wipe it all up

There was no way I was going to reuse it so here I am throwing it away.
So, that's keeping it real and showing you that sometimes things don't go the way as planned.

To continue with a fresh batch of batter, carefully spread the green batter evenly over the chocolate batter.  Pop it into the preheated oven and bake for 30-35 minutes...

...until lightly brown on top and a wooded toothpick inserted in the center and comes out clean.  Cool in pan on wire rack.

GLAZE RECIPE
3/4 cup mint chocolate chips, melted
2 tbsp. butter, softened
1-2 tbsps. light corn syrup
1/4 cup crushed peppermint candy canes

Combine the melted mint chocolate chips, butter and 1 tbsp. of corn syrup.  If it's too dry, add more corn syrup.

Carefully spread glaze over cake.

If you haven't done so yet, put five candy canes into a zip lock baggie and crush with a mallet or rolling pin.

Sprinkle the glaze with the crush peppermint candy.  Cover and place in refrigerator to cool for about 4 hours or overnight

Once the cake has cooled,  use the foil to lift cake out of pan and place it on a cutting board.

Trim off the edges first, cut into squares.

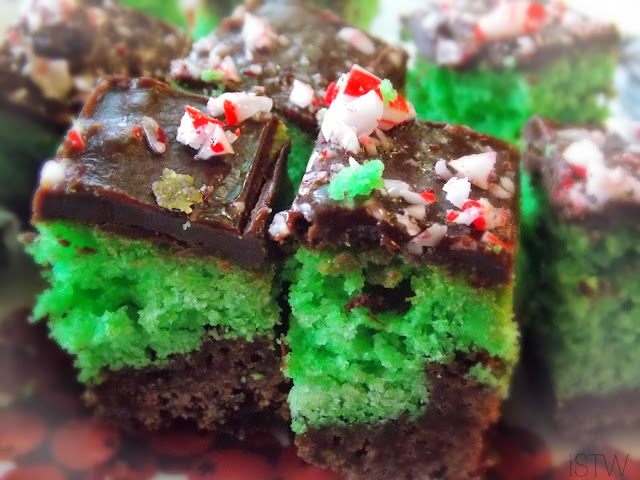
...and serve!


You may freeze it too!

Our daughter found this recipe years ago and ever since then it's been another holiday favorite.  If you like chocolate and peppermint, these are for you and oh, is it ever so good!!  You will not be disappointed.

Enjoy your weekend.  Keep safe and remember to savor every moment with your loved ones.


Wednesday, December 4, 2013

DIY - Instant Aged Wood Look

With many Christmas decorating projects going on, I have noticed a lot of beautiful and creative aged wood decorations such as Christmas trees, plaques, even tables.  Here's how to do it.  I stumbled onto this tip by accident last Spring when hubby made some shutters for me.  

I mixed about a 1/4 cup of ASCP Graphite with 1 1/2 - 2 cups of water.

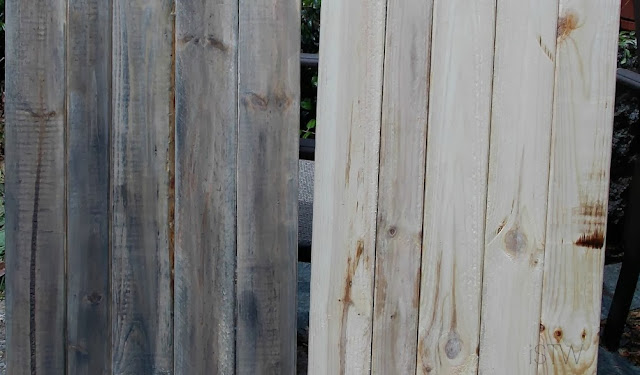
The shutter on the right is plain pre-treated wood.
The shutter on the left has been painted with the watered down ASCA Graphite solution.
I was amazed how "dead" the wood looked and it dried in almost an instant.

It didn't need much sanding as it looked authentic enough as it was.  And that's it folks.  Nothing else to do, just continue decorating your project now that you have the old aged wood look that you want.

Enjoy making those decorations and savor every moment.


Tuesday, December 3, 2013

*UPDATE* I'm Dreamin' of a Rustic Christmas


Front part:  We've had this sled for over 10 years.  The bench I moved from my backyard garden that I used to place plants and flowers on it.

 Front porch:  The lamp post I bought from a crafter in upstate NY years ago.  I'm always thrilled to pull it out for Christmas.  I can't remember where I got the wreath.

 Magnolia cones from our own Magnolia tree.  How much more rustic can they be?

I finally found these ice-skates that I've been looking for the past few years.  They were deep down in the bottom of an old plasic bin. The skates are at least 45 years old.

Magnolia stems and leaves from our Magnolia tree.


I love the way this wreath hangs from the wooden lamp post.

Pine cones, burlap and such go so well together, wouldn't you say?

I have a thing for Moose, especially Christmas moose.  I cannot resist buying one off the shelf when I see it.

Some more moose and friends

Our warm and cozy fireplace that is keeping us comfortable this winter.

Dry sticks in a canning jar with a Red Cardinal stuck on top is the perfect touch.

Here's our Christmas tree:  Raffia bows, Cranberry strings, Holly garland, Poinsettia flowers and old, retro decorations.  Although everything is fake, these days they make flowers, leaves and berries look so real.  I didn't have to buy a thing this year for our tree.  I love it!

Here are my Birchwood candle holders again.  I surrounded them with some Magnolia cones.

Our home, WELCOME!

A night time view of our Christmas tree

*UPDATE* December 6, 2013
Thanks to Monique from "La Table de Nana", she suggested I wrap the poinsettias in some jute fabric.  I had quite a bit leftover from my Birch candles and here are my poinsettias.  (Thanks again Monique! I feel so much better)
 

For the pass couple of Christmas' I have been drawn to the rustic Christmas look and it's growing stronger more and more each year.  I'm also traditional and can't and won't get away from the green and red colors. 

Our porch may end up looking another way as I'm not sure I like the way it currently looks.  There's something about it that just doesn't fit right and I'm thinking it might be that foil wrapping around the Poinsettia pot.  It's not rustic and it's bothering me. Anywho...

This is a small tour of our Rustic Christmas.  Hope you're having fun decorating your home the way that makes you happy.  Enjoy it and remember to savor every moment!

Related Posts Plugin for WordPress, Blogger...