Tuesday, April 9, 2013

Welcome to our Nest - Family Tree

Welcome to our Nest!

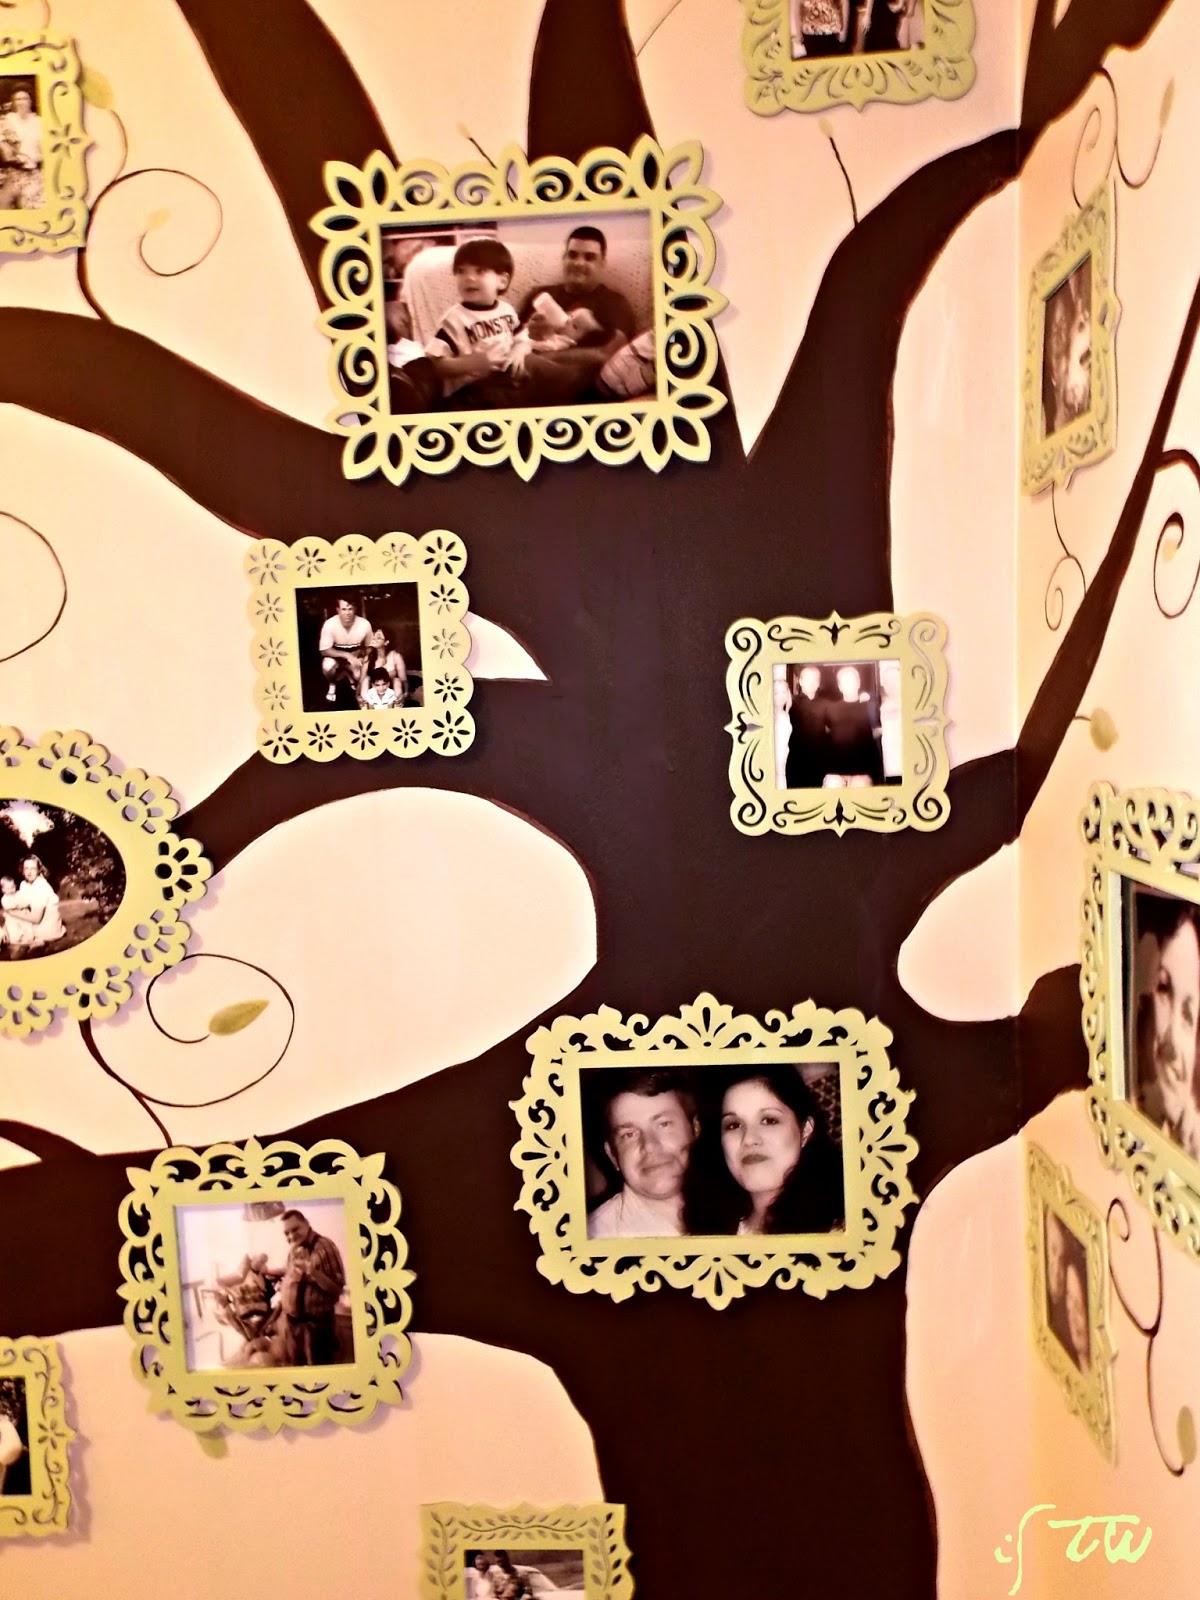
Our family tree is finally complete

A few closeups to share.  Top: My mother-in-law.  Middle: my mother.  Bottom: My sister and her hubby

The picture in the middle of the tree trunk is a pic of my hubby and I back when we were engaged, a week away from our own wedding.


Our son and his kids are in the top right picture.  Near the top on the left is our daughter.

One of my favorite pictures on the wall of my husband, his brother and parents.  My hubby's the cute blondie on the grass.

Here's the other one of my hubby, wasn't he adorable?

This is one of my two brothers.  He's mentally challenged and he's celebrating his birthday with some balloons in this picture.

so this is what you see when you first walk into our home, our family tree

Have a blessed week and remember to savor every moment!

Click here and see how I started painting the tree.

Monday, April 8, 2013

Street Find TV Hutch

Annie Sloan Chalk Paint has created a monster.  I'm searching all over the house seeing what else I can paint and transform and give it new life.  I remembered I had this piece of furniture in the basement for about two years now.  

One morning as I was leaving for work about two years ago, a house up the street had this two piece unit in front of it by the curb with a big sign that said "FREE".  I stopped and looked at it and decided I wanted it.  It was in great shape with a few knicks here and there.  I immediately called my hubby (good thing he's retired) and told him to go grab it!!  He said it was so heavy he had to make two trips (with a dolly).

I planned to paint my hubby's armoire as well, that's why I picked the graphite color because it was the most "manly" color ASCP had. 

Here's hubby' armoire. It's made out of cedar.  I bought it for only $25 about 25 years ago at a yard sale when we lived in NY.  I had taken off most of the varnish years ago and that's where I stopped and never did anything to it until now.

Hubby photo-bombed this pic.  He's thrilled with his new armoire.

Here's the armoire in it's rustic state, the way hubby wanted it.

So now we're back to my street find.  This is the top section.

Here's the bottom section

I decided to separate them only because it was just to high to put together in  Grandma's living room.  I placed the bottom section right in front of my military wall.

The TV would normally go into the bottom part of this top section BUT it wouldn't fit.  I'm not really crazy how it looks here but we'll let it sit here until we figure out what to do with it.  

I spent all weekend working on these three pieces of furniture along with another craft project as well as trying to put some finishing touches on my family tree.  A busy but fun weekend.  I'm certain hubby is happy that I'm back at work :)

Savoring every moment

P.S.  I had to turn on Word Verification because I'm getting a lot of SPAM! :(

Saturday, April 6, 2013

Every Moment, Thank God


I saw this on Pinterest and immediately fell in love with it.  I struggled whether I wanted to paint it myself or design it on my computer.  I went with the latter and I'm so happy with the end results.  I used "My Memories Suite" software to make the design.  Very simple to use and if you don't have it, I suggest you get it, it's worth it and they're constantly coming out with all kinds of designs and graphics to help you make all kinds of crafts.

When I saved my project on my computer (I saved them in JPEG format).  I ordered them online through Walgreens.  Here is what you'll need:
Mod Podge - Antique Matte
1 sponge brush
5 8x10 photos
9 ft., 2 1/2" wide ribbon spool
5 thin canvas frames
Glue gun and glue sticks
Scissors

Dip the sponge brush into the Mod Podge

Spread it on the canvas frame to all four edges.  Act quick because this stuff dries pretty fast, set aside.

Dip the brush into the Mod Podge again and this time spread it over the back of a photo.  Take care that when placing the photo face down, that the surface is clean.  Again, act fast because it dries fast.

Place the photo back side down on top of the canvas frame so both glued surfaces are touching, matching edges as close as possible

I used my clean bakers spatula to press over the photo to flatten out any bubbles and to make sure the adhesive adheres correctly

Dip the brush in some Mod Podge again and use it to cover the whole photo.  Make sure to cover the whole surface.  Set aside to dry (in about 30 minutes).  Repeat this process with all the photos.

Once all the photos were dry, I rolled out the ribbon and made sure the photos were placed on top of the ribbon just right.  I then hot glued them to the ribbon.  I made sure there was at least 3-4" of extra ribbon at each end.   I let is dry overnight.

With the leftover ribbon, I made a small bow and attached it to the top.  I hung it with some command strips and I hung it in high traffic area, where all the bedrooms are located as well as the main bathroom and my hubby's office.  I like it as it's the first thing I see when I leave my bedroom which will be a great reminder for me as I leave for work in the mornings.

I've had a great weekend so far, working on this project as well as painting some more furniture and putting some finishing touches on my family photo tree.  I am definitely savoring every moment and pray you are too.


Monday, April 1, 2013

Red Velvet Brownies and then Some

copycat from myrecipes.com

1 (4 oz.) bittersweet chocolate baking bar, chopped
3/4 cup butter
2 cups sugar
4 large eggs
1 1/2 cups all-purpose flour
1 (1 oz.) bottle red liquid food coloring
1 1/2 tsps. baking powder
1 tsp. vanilla extract
1/8 teaspoon salt
Small-batch Cream Cheese Frosting
Garnish:  white chocolate swirls

Preheat oven to 350F degrees.

Line bottom and sides of a 9x9 inch square pan with aluminum foil, allowing 2 to 3 inches to extend over sides

Chop the bittersweet chocolate baking bar into small pieces

Microwave chocolate and butter in a large microwave-safe bowl at HIGH 1 1/2 to 2 minutes or until melted and smooth, stirring at 30-second intervals.

Whisk in the sugar

Add eggs, one at a time, whisking just until blended after each addition.

Combine the flour, baking powder and the salt in a separate bowl.  Gently stir in flour mixture.

Add the red food coloring and ...

blend well until the mixture is uniform in color

Pour mixture into prepared pan and bake for 44-48 minutes or until a wooden pick inserted in center comes out with a few moist crumbs.  

Cool completely on a wire rack (about 2 hours)

Lift brownies from pan, using foil sides as handles; gently remove foil.

Spread Small Batch Cream Cheese Frosting
1 8 oz. softened cream cheese
3 tbsps. softened butter
1 1/2 cups powdered sugar
1 tsp. vanilla
Beat cream cheese and butter at medium speed with an electric mixer until creamy.  Gradually add powdered sugar and salt beating until blended.  Stir in vanilla.

Spread frosting on top of brownies.

Get fancy if you'd like, or not

With a long sharp knife, cut into 16 square pieces

and enjoy!

These were our desserts for our Easter meal.  Our daughter made the other two, top left: is her Hummingbird Cake (a classic southern cake according to the March issue of Southern Living).  Top right: Banana Pudding Cookies.  I'll have to ask her for the recipe as I couldn't find it.  Bottom center, Red Velvet Brownies.  Everything was so delicious and we're fortunate to have some leftovers, yum!

This Easter weekend went by too fast, I enjoyed every minute and am thankful for my family, friends and faith.  ~ Savoring every moment!
Related Posts Plugin for WordPress, Blogger...