Sunday, March 16, 2014

Don't Get Tied Up

3rd and final in Coffee Creamer Upcycled Bin

What a fun project this was, once I got the hang of it.  I painted two coffee creamer bins in a beachy coastal theme.  I then looked on Pinterest to get ideas to see what I could do with it next.  When I found this site and the instructions on how to make a Fish Net, I knew I could do it, especially since I had plenty of jute string.  Here is the tutorial on how to make a Fish Net:  CRAFTBERRY BUSH. Scroll down a couple of times until you get to the tutorial.

Doesn't it look cool??

Thus ends the "coffee creamer bin" series.  Upcycle people!  Your community will love you, the earth will love you but most of all, you will love you! :)
Here are my links to the other two:
Rusty Business
Upcycled Plastic Creamer Bins

Have a great weekend and remember to savor every moment!

Saturday, March 15, 2014

Upcycled Plastic Creamer Bins

#2 of 3 in my series of coffee creamer upcycled bins.

I'm on a roll now.  Making something out of my plastic creamer and coffee bins has got me really excited and in a crafty frenzy!  I used the same bins yesterday to make them look "junky/rusty" with a chalk label painted in the front.  So much fun!  Check out my rusty bins here.

  • Two plastic coffee creamer bins
  • Rust-Oleum spray primer
  • White acrylic paint
  • Paint brush
  • Sponge brush
  • Clip art print outs
  • Mod Podge glue
  • KRYLON Matte finish sealer
First prime the bins with the Rust-Oleum primer.  Once they dry, paint them with white acrylic paint.  It took about four coats to paint the bins completely.

I printed some French writing, a French wreath with a bee and a French label for cacao.  I found all these print outs at this awesome website:  The Graphics Fairy.  Check it out!  The only Mod-Podge glue I found was this one that gives a Fine Crackle effect.  It's not the effect I was looking for but I'll still use it and see what happens.

With a sponge brush spread the Mod-Podge throughout the back of the torn print out.  Make sure to cover the whole surface.

Place it carefully on the bin and gently smooth out towards the edges.  Spread a layer of Mod-Podge over the top of the piece and spread it past the edges.

I repeated the same with the picture of the French Wreath with a Bee and the French Cacao label.  Once it dries, spray with the Matte Finish for protection.

The French script writing looks so good, I love it!!

So far these past two days I have upcycled and painted nine plastic bins.  There are two others bins I painted in a beach them and I will post those tomorrow.  Told ya I was on a roll!

**UPDATE  3/16/14**

I added flowers to both bins.  Don't they look so much prettier?!

Here's the link to my Beach Coastal ones (wait 'til you see what I did with these ones):  Don't Get Tied Up

Have a great weekend and savor every moment!


Friday, March 14, 2014

Rusty Business

#1 of 3 in my series of coffee creamer upcycled bins.

Are you like us. . . . ?

Do you have a ton of these hanging around the house??  This is just the tip of the iceberg for us.  
 Why do we save them??


For one, I love the handles.   One on the left. . . .

. . . and another one on the right.  Makes it so easy to carry whatever you have stored in them, they're also very sturdy.
Hubby uses them to store his nuts and bolts and the like.  I use them to hold my markers, pens and paint brushes.  Obviously, I didn't like the original pictures and text and didn't know what to do until I recently ran into this blog:  How to-Paint Faux Rust by Colleen Jorgensen, a life saver in my opinion.  In Colleen's blog post, she was able to turn wood, plastic and cardboard paper into rusty items!  I was intrigued and had to continue reading and eventually I copied.  Here is my project:

This is the real stuff.  Fortunately I found it out in the garage, studied it and used it as a reference.

 So, to transform my plastic bins into rusty looking cans, I needed all this:
  • RUST-OLEUM Rusty Metal PRIMER
  • Acrylic Paints:
    • Craft Smart Orange Spice
    • Americana Terra Cotta
    • Apple Barrel Yellow
    • Apple Barrel White
    • Apple Barrel Black
  • KRYLON Matte Sealer
  • Craft Smart Chalk Paint, Black
  • One stencil sponge brush, size of a nickel
  • One regular paint brush
Plus a jar of clean water and some paper towels.

 First, I spray painted the bin with the Rust-oleum Rusty Primer


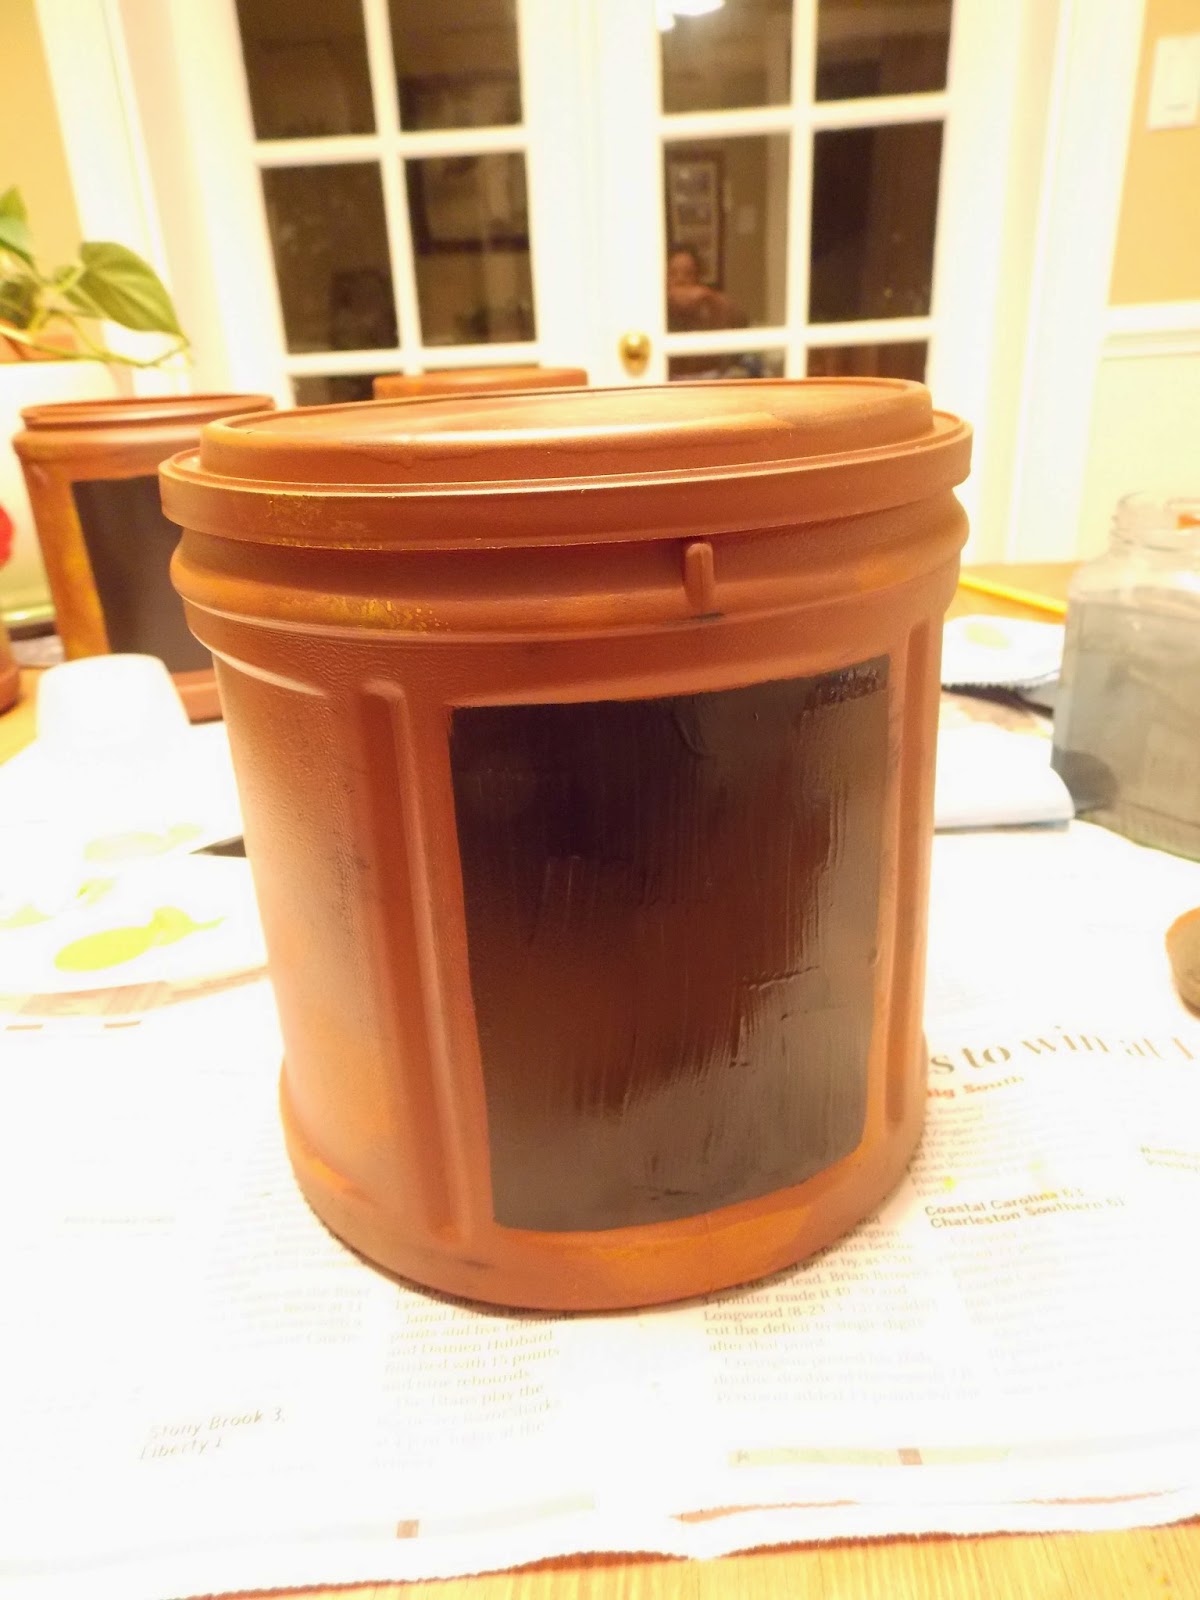
Since I didn't have a sea sponge I used a stencil sponge brush for all the paint applications.  I then sprayed it with the Matte sealer.

This bin ended up being my favorite one of all the ones I painted.  Closest to it being realistic as I could get.

Once the sealer dried (in about 15 minutes) I took an extra step and added a square of chalk paint in the front.  The Folgers coffee bin again was my favorite, it has a grooved frame in the front to paint an almost perfect square, depending on how shaky your hand is.

I repeated the process with all the other bins.

Since the black chalk paint was still too fresh to write on, I super-imposed the lettering using PicMonkey.

Don't they look cool??  I am very happy with the turnout.  Thank you Colleen :)

Have a great weekend and remember to savor every moment!

SHARED WITH:
Funky Junk Party Junk

Monday, March 10, 2014

I'm on Kickstarter

I'm on Kickstarter! 

Kickstarter is one of a number of crowdfunding platforms for gathering money from the public by entering a project of yours you need help funded.

My project?  It's my Native Americana Folkart.  I want to create awareness of my Native American roots and what better way than to draw my ancestors/culture through Folkart.  If Grandma Moses could do it, so can I!    I've been creating my drawings with my Wacom Intous Pen Tablet, the high tech way to draw this day and age.  Here's a sample of one of my drawings:

My Kickstarter project went live on March 4th so as of this writing I only have 25 days to go to reach my goal of $500, that's the bad news.  The good news is that I have more than half of it pledged.  If you're interested in helping out, I would forever be so grateful from the bottom of my heart.  Here's the link to my project, go check it out for the fun of it too.  While you're at it, check out the multitude of other great projects.  There are a lot of creative and talented people out there!

Native American Folkart by Beverly DeVerney Cole

Thank you!

Beverly DeVerney Cole


Saturday, February 22, 2014

Craft Day

It's not every Friday I wake up to a clean house, laundry all done and so much free time on my hands.  So with some coffee in my cup, a Jerry Lewis movie on Netflix and me still in my jammies, I decided to finish up some crafts.

Oh what fun I had.  First off,  I finished my burlap wreath inspired by someone on Pinterest.

I then noticed how sickly Mr. Gnome looked.  I've had him for at least 3 years guarding our front lawn.  I first thought about throwing him away but then it dawned on me that I could probably give him a makeover

and I did!!  It was so much fun!

So, if you have a sickly looking Mr. Gnome, I'll be glad to give him a make over if you don't feel like it ;)

Have a great weekend and remember to savor every moment!


Friday, February 21, 2014

Simple Roasted Chicken and Chicken Spring Rolls

adapted and tweaked from Bon Appetit March 2014

This recipe is so simple and oh sooooo good!

1 3-5 lb. roaster chicken
Butcher's twine
1 1/2 - 2 tbsps. kosher salt
1 tbsp. fresh ground pepper
1/2 garlic bulb
Fresh herbs (I used thyme, rosemary and sage)

Preheat oven to 400F degrees.

Here's my kosher salt and fresh ground pepper.  I combined them both in a ramekin.

Don't be afraid to rub the salt and pepper mixture all over the roaster chicken.  Put some inside the cavity too.

Place the garlic and fresh herbs into cavity.  Tie legs with butcher's twine.  Place on wire rack and cookie sheet.

Bake in oven for 1hr. 20 minutes or until golden brown and meat thermometer inserted in thickest area reads 165F degrees.

Isn't she a beaut??  Just wait until you sink your teeth into this baby but hold on, not quite yet.  Cover with some foil and let the roaster sit for about 10 minutes.
This was my plate, I love drumsticks.  I don't eat the skin most of the time but I couldn't help it with this baby.  Mercy!  She was juicy and deeeeelicious!!

Suffice to say, we had plenty of chicken left over, so this is what I did the following day.

I made some Chicken Spring Rolls

Here are the ingredients:
7-8 rice paper sheets (follow pkg. directions on how to use)
7  pieces of your favorite type of lettuce
1 cup cooked rice or soba noodles
1 cup cooked leftover chicken (warmed up in 3 tbsps. soy sauce, 1 tbsp. fresh ginger minced, 2 tsps. sesame oil - do not cook)
1/4 cup carrots, julienne
3 green onions, julienne
Peanut dipping sauce


Place on top of wet rice sheet starting with the lettuce, noodles, meat, carrots and green onions.  Fold over and roll.  Don't laugh at mine.  I need to work on my technique ;)

Dip into Peanut sauce and enjoy!!  Boy did I ever enjoy these.  I could live on the for the rest of my life!  No kidding!  They were so good,  I think I'll have more tomorrow :)

Have a GREAT weekend and don't forget to savor every moment.


Thursday, February 13, 2014

Snow Day for Adults

Gone are the snow days when the kids were young and woke up late in their pajamas to the wonderful aroma of pancakes coming from the kitchen.  Excited that there was no school but better yet, a luscious pancake breakfast used to fuel all the activities that a snow day brings.  I enjoyed making them pancakes, it kinda felt like a holiday for me.  My son loved a stack with lots of syrup.  My daughter loved hers in a Mickey Mouse shape with chocolate chips. 

Today is a snow day in our town as a matter of fact, every school in the state of Virginia is closed.  So to kinda keep up with tradition and even though our kids all grown up and it's just hubby and I, I decided to cook hubby a "big" breakfast.  An omelet with everything I could put in it, including corn tortillas.  Go figure, growing up in a Mexican-American home, we found a dozen ways to use corn tortillas in our recipes as they were a main staple in our pantry.

Here's the recipe and instructions to this omelet but please note, omelets are diverse.  You can put anything you want (that's edible) in an omelet.  This is what I put in ours for today:

Olive oil
3 corn tortillas, sliced into bits & pieces, whichever way you like
1 tbsp. pure butter
4 eggs, whisked until it very bubbly (by hand about 5 minutes or 3 minutes with mixer - the more you whisk, the fluffier the omelet)
1 cup cooked breakfast sausage, chopped
1 cup Monterrey Jack/Colby cheese, freshly grated
Kosher Salt & Pepper
1/4 cup fresh chives, diced

Heat oil in a hot 10" skillet
Cook tortilla pieces until browned and slightly crispy, remove from pan a set aside.
Turn heat down to low and melt butter, spread around pan.
Add egg and cook until edges are soft yet cooked and the egg mixture is semi cooked all the way.
Sprinkle on salt & pepper.
Sprinkle tortilla pieces, cooked sausage and 1/2 the chives evenly over egg mixture.
Add the cheese and distribute evenly.  Cover and cook for about 5-7 more minutes or until the egg mixture is cooked all the way.
With a rubber spatula (because of it's flexibility), gently push it under half of the omelet, being careful not to tear it (if you do, it's okay - practice makes perfect) and fold over until it takes the shape of a half moon.  Cook for another 30 seconds until the cheese melts.  Sprinkle with the rest of the chives.

Remember:  You can put almost anything from sliced tomatoes, spinach, mushrooms, salsa, yesterday's leftovers into an omelet.  Be creative, the possibilities are endless!

I cut a small piece of the omelet for me and gave the rest to hubby, served with toast.

Wherever you are, makes lots of memories on these snow days, even if it's just you and your hubby.  Enjoy your weekend, and remember to savor every moment!
Related Posts Plugin for WordPress, Blogger...