Sunday, January 9, 2011

My Lasagna

  • 1-½ pound Ground Beef
  • 1 pound Hot Breakfast Sausage
  • 2 cloves Garlic, minced
  • 1 medium onion, diced
  • 1/2 cup red wine
  • 2 cans (14.5 Ounce) Whole Tomatoes (or Hunts fire roasted tomatoes)
  • 2 cans (6 Ounce) Tomato Paste
  • 2 Tablespoons Dried Parsley (I had to use my fresh homegrown Parsley since I didn't have dried)
  • 2 Tablespoons Dried Basil
  • 1 teaspoon Salt
  • 3 cups Lowfat Cottage Cheese (or Ricotta plus I only used around 10 oz. because that's all I had)
  • 2 whole Beaten Eggs
  • ½ cups Grated (not Shredded) Parmesan Cheese (or Romano because that's all I had)
  • 2 Tablespoons Dried Parsley (or fresh - see above
  • 1 teaspoon Salt
  • 1 pound Sliced Mozzarella Cheese
  • 8 oz. bag of shredded Italian cheeses
  • 1 package (10 Ounce) Lasagna Noodles (or 9 Lasagna noodles)
  • salt and pepper to taste
  • Hot pepper flakes (optional) - I chose not to use these afterall, since the sausage is supposed to be hot)


Spray a 13" x 9" casserole dish with PAM, set aside.

As Pioneer Woman would put it, here are the cast of characters

Must always work with a cup of coffee, especially on a cold wintry day.

Cook the ground beef, sausage meat, garlic and onions until brown.  Drain most of the fat only leaving about 1/4 cup.

Add the wine, canned tomatoes and tomato paste and stir completely

Add the parsley and the basil and stir in.  Simmer the sauce for about 45 minutes.  In the meantime, in a large pot,  boil about 3-4 quarts of water.  Add a pinch or two of salt after the water starts to boil.  Remove pot from heat and add the Lasagna noodles one piece at a time.  Add a tbsp. of olive oil.  Stir gently and leave the noodles in the hot water for 20 minutes.  (I learned this trick from Ina Garten [Barefoot Contessa] and the noodles come out PERFECT plus they're easier to handle and don't break apart). 

Combine the eggs, Parmesan and Cottage Cheese (I used Romano and Ricotta because that's all I had) and parsley (I only had fresh).  Stir thoroughly and set aside.

This is my somewhat assembly line...yea really, it is!  In this order:
Cooked lasagna, casserole dish, egg mixture, mozzarella & shredded Italian cheeses, cooked meat sauce

Lay three lasagna noodles down first, it's okay if they overlap.  Next spread 1/3 of the egg mixture sauce over each noodle.  Then lay and sprinkle the cheeses. 

Next, layer and spread 1/3 of the meat sauce .  Repeat these steps two more times but in the last or top layer exchange the cheeses and meat mixture....

....in other words, ending it or topping it with the cheeses.

Bake in 350-degree oven for 30 minutes or until bubbly.

Set aside while you finish with any other side dishes.

Bon apetit!

I pulled ideas from two-three different other recipes and added some of my own stuff and came up with this delicious meal that you're family will keep go back for seconds, thirds, etc.,  Maybe it's because of the wine that I added, or because I used Ricotta cheese instead of cottage cheese.  In years past seems like the lasagna I've made came out to cheesy or too milky, blechhh!!  I like more tomato sauce and meat and by golly, I believe I found the recipe.  And to be quite honest, I forgot to spread some of the egg/cheese mixture onto the 2nd layer which means I had to add the rest into the last layer.  I was really nervous, thinking it would be obvious but it wasn't, it was all perfect.  The trick with the noodles is really cool.  Seems like in years past, when I cooked them according to directions, they always fell apart and shredded to pieces and tasted too mushy.  This way, they're just under al dente but when they cook some more in the oven, they come just right, not too mushy not tough at all, just RIGHT!  The hubster and mother-in-law loved it and so did I  ~isavor the weekend

Football season is quickly coming to an end, college football that is.  I know I didn't really write too much about it this past season, maybe because by the time I got done with the "food" part, I was really tired and wanted to call it a night.  So in the FCS Championship game, played Friday night, it was E. Washington vs. Delaware.  E. Washington trailed the whole game until the very end.  Looked like the Blue Hens of Delaware had it but the Eagles of E. Wash., a couple of tricks up their sleeves and came out the National Champions within the last two minutes of the game.  *whimper* someday, Liberty will be playing in that game.

Tomorrow night, is the BCS Championship game Auburn Tigers vs. Oregon Ducks, am really looking forward to watching it but wish it were on the weekend, it's hard to stay up late for a game and have to get up early the following morning to go to work.  So, I'm thinking and believing that the Auburn Tigers are going to come away with the win, don't ask me why, I couldn't tell although, Oregon Ducks are pretty tough - don't let their mascot fool you. :)

Thursday, January 6, 2011

CHOCOLATE BREAD PUDDING

by Paula Deen, prepared by Chef Elise


Ingredients

  • 1-pound loaf French or Italian bread, cut into cubes (about 15 cups)
  • 3 cups milk
  • 1/4 cup heavy cream
  • 1/2 cup coffee-flavored liqueur
  • 1 cup granulated sugar
  • 1 cup packed light brown sugar
  • 1/4 cup cocoa powder
  • 1 tablespoon vanilla extract
  • 2 teaspoons pure almond extract
  • 1 1/2 teaspoons ground cinnamon
  • 6 large eggs, lightly beaten
  • 8 ounces semisweet chocolate chips

Directions

Preheat the oven to 325 degrees F.
Lightly grease a 13 by 9-inch baking dish. Place the bread in the baking dish.
In a large bowl, whisk together the milk, cream, and liqueur.
In another bowl, combine the granulated and brown sugars with the cocoa powder and mix well. Add this to the milk mixture and whisk to combine.
Add the vanilla and almond extracts and the cinnamon to the beaten eggs. Combine the egg mixture with the milk mixture and mix well. Stir in chocolate chips. Pour the mixture evenly over the bread cubes; let stand, stirring occasionally, for at least 20 minutes, or until the bread has absorbed most of the milk mixture. Bake the pudding for 1 hour, or until set; a knife inserted into the center of the pudding should come out clean. Serving the pudding warm, or refrigerate it and serve chilled.

Serve it warm or cold, with whipped cream or a dessert sauce.
WOW, WOW, WOW!!!!!  YUUUUUUUMMY!!!!!  This was our dessert after that scrumptious Baked Shrimp Scampi dish that Elise cooked for us.  After this meal, I'll have to fast until next Christmas!!!  Great job Elise, once again you out did yourself :)  Keep it up!

BAKED SHRIMP SCAMPI

by Barefoot Contessa - prepared by Chef Elise


Ingredients

  • 2 pounds (12 to 15 per pound) shrimp in the shell
  • 3 tablespoons good olive oil
  • 2 tablespoons dry white wine
  • Kosher salt and freshly ground black pepper
  • 12 tablespoons (1 1/2 sticks) unsalted butter, at room temperature
  • 4 teaspoons minced garlic (4 cloves)
  • 1/4 cup minced shallots
  • 3 tablespoons minced fresh parsley leaves
  • 1 teaspoon minced fresh rosemary leaves
  • 1/4 teaspoon crushed red pepper flakes
  • 1 teaspoon grated lemon zest
  • 2 tablespoons freshly squeezed lemon juice
  • 1 extra-large egg yolk
  • 2/3 cup panko (Japanese dried bread flakes)
  • Lemon wedges, for serving

Directions

Preheat the oven to 425 degrees F.
Peel, devein, and butterfly the shrimp, leaving the tails on. 

Place the shrimp in a mixing bowl and toss gently with the olive oil, wine, 2 teaspoons salt, and 1 teaspoon pepper. Allow to sit at room temperature while you make the butter and garlic mixture.

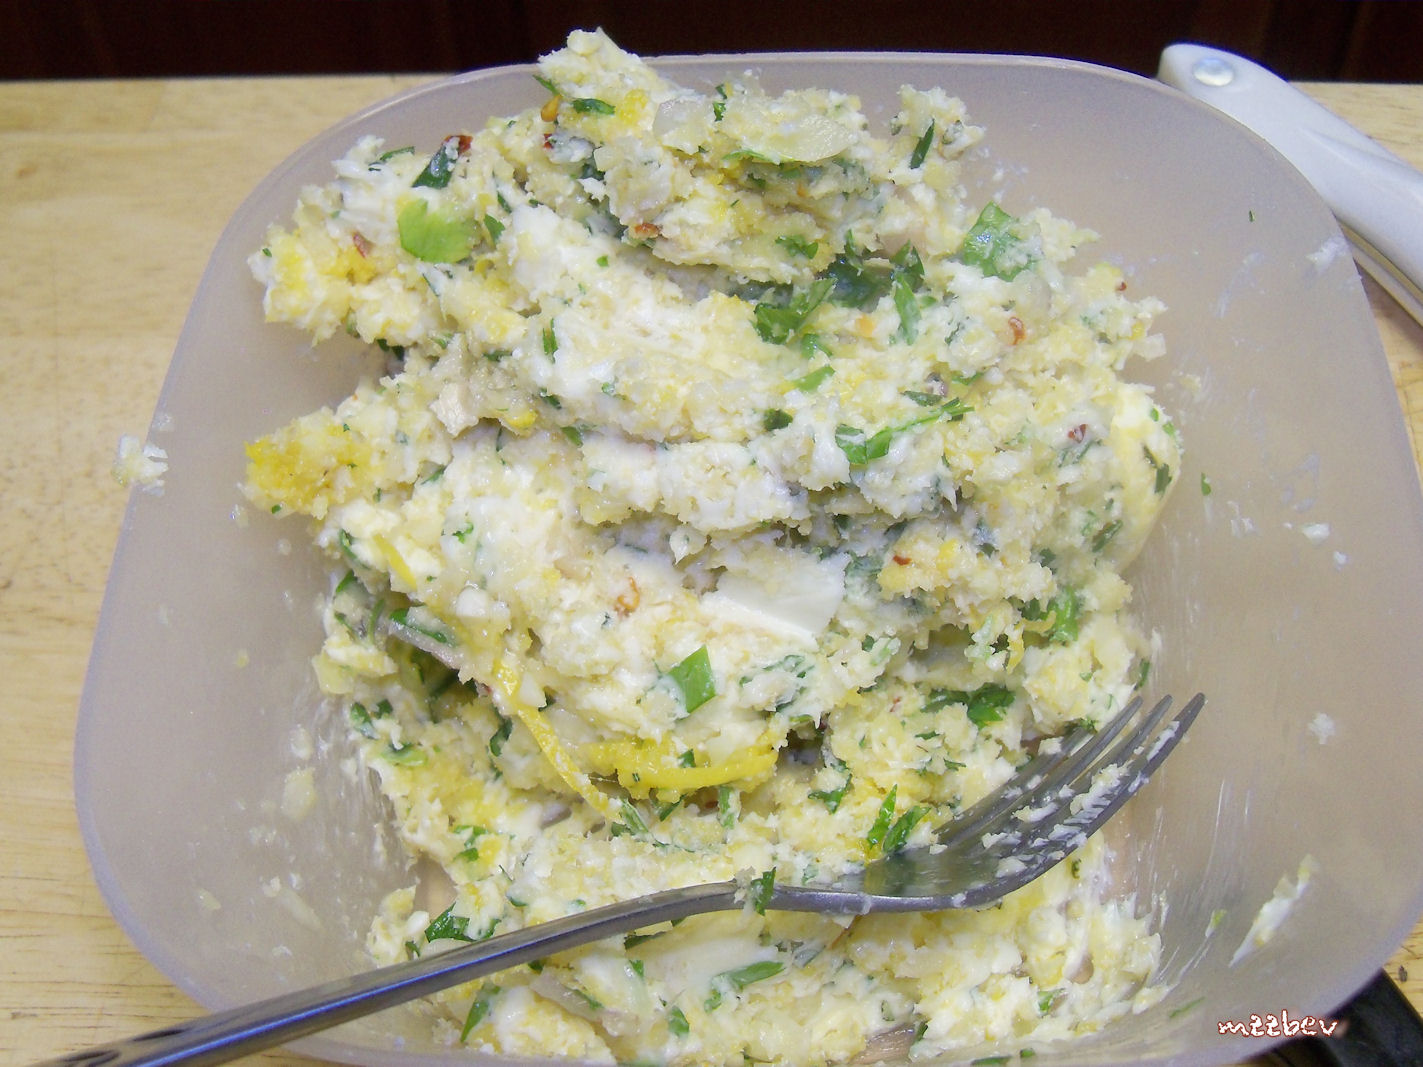
In a small bowl, mash the softened butter with the garlic, shallots, parsley, rosemary, red pepper flakes, lemon zest, lemon juice, egg yolk, panko, 1/2 teaspoon salt, and 1/4 teaspoon of pepper until combined.

Starting from the outer edge of a 14-inch oval gratin dish, arrange the shrimp in a single layer cut side down with the tails curling up and towards the center of the dish. Pour the remaining marinade over the shrimp.

Spread the butter mixture evenly over the shrimp. 

Bake for 10 to 12 minutes until hot and bubbly. If you like the top browned, place under a broiler for 1 minute.

Voila!  It's that simple!

Elise's day to cook!  Yay!!  That always makes me a happy camper not only because it frees me up to get our house together (since we just moved into it) but also because of what delectable tasty treat she's going to make. This dish was in no way a disappointment!  To quote my hubby, "I wouldn't have been surprised to have ordered this at Red Lobster".  This was a fabulous dish, no wonder it has 5 stars rating the recipe at Foodtv.com.  If you are a shrimp lover, you will never want to go out to eat when you're craving shrimp.  This dish is simple to make plus it's fantastic!  We served it on a bed of angel hair pasta quickly stirred up with butter, 1 tbsp. fresh lemon juice, one or two garlic cloves, minced and a dash of red pepper flakes, salt to taste.  Thanks Lisee!

Tuesday, January 4, 2011

Don't Throw That Christmas Card Out Just Yet!!

It's been a busy holiday season not for the obvious reason but because we were, we are crazy enough to have moved to a new home.  We closed a week before Christmas and spent the following week packing and moving and packing and moving, etc.,  Needless to say, our Christmas this year was not at all normal.  Our daughter kept joking around that we were going to be that family in the movie, The Christmas Story, and go eat Chinese food on Christmas eve.  Anyway, I am so weary and at this point though, I can't remember what we did on Christmas eve besides go to church. 


I believe I got this idea from Focus on the Family many years ago as we have been doing this ever since and consider it a family tradition.  But just before you throw those cards away, hold onto them, place them in a container (because of the move, I can't find the cute container I usually put them in - a red sleigh) and place the container in a prominent place where you and your family gather together to pray.  We have always done it during our family dinner.   All you do is pull a card and pray for that person or family.  They can also be a topic of conversation, you can reminisce about the times you spent with this particular person/family.  You can also go as far as to send a note to this person/family to let them know that they were thought of and prayed for.


So, don't throw that card out just yet!!  You've got some praying to do :)


Happy New Year!


I've shared this with:

Asparagus with Romano Cheese by Ina Garten


INGREDIENTS:
1 bunch fresh asparagus
Olive oil
1/2 - 3/4 cup fresh Romano Cheese (or Parmesan), shredded
Kosher salt


Set oven broiler on high


Spread the asparagus across a cookie sheet

Drizzle with olive oil

Sprinkle with salt and then the cheese.  

Place in oven, under broiler for about 5 minutes keeping close watch (do not walk away) as it's easy to burn these if you're not careful.  Once the cheese starts to brown, they're ready to take out.  If they're not browned after 5 minutes, add a minute at a time until they're browned.  Voila!  They're done!  It's as simple as that!  Enjoy!  

I have always loved asparagus but it's been tough to get hubby.  He did eat some tonight but he only ate the tips, so I guess you can say we're making progress ;)  ~isavortheweekend

Sunday, January 2, 2011

FRIZZANTE AND GOBLETS

This fizzy stuff is awesome.  It's a European Soda and we can only find and buy it at Wegmans stores, in No. Virginia.  We usually buy them for special occasions just like we sometimes do with sparkling cider (yes, they're non-alcoholic).  This flavor is Cranberry Lime but my favorite one that we still have in the refrigerator is Blood Orange.


I am so proud of these goblets.  They have a beautiful glass sketched snowscape topped with a gold ring around the rim.  Whether it's real gold or not I don't know.  I've had them for at least 10 years, started out with around 12 and now have 8 :(  and you'll never guess where I got them?  I bought them at Arby's.  Yes, the fast food chain restaurant where they sell the best roast beef sandwiches.  All I needed to do was buy a meal or a sandwich at Arby's and then I could buy one these gorgeous goblets for only .99 cents.  I fell in love with them and made many a trip to Arby's to have a collection.  They also sold a smaller, around 6 oz. tumbler with the same snowscape and gold rim.  I bought around six of them but couldn't find them in time for this Christmas.  Anyway, I love these goblets and I always look forward to bringing them out for the holidays.  It breaks my heart to put them back in storage but am glad that I didn't break one this past season.  isavortheweekend


RED VELVET CAKE

by Pioneer Woman


INGREDIENTS:
Red Velvet Cake
1 cup shortening
1 3/4 cups sugar
2 1/2 cups cake flour
1 1/4 tsps. salt
2 large eggs
1 cup buttermilk*
1 tsp. pure vanilla extract
1 tsp. baking soda
1 1/2 tsps. vinegar
1 oz. red food coloring
1 1/2 tsps. cocoa powder


Cream Cheese Icing
1 1/2 8 oz. packages cream cheese, at room temperature
1 1/2 stick (3/4 cup) unsalted butter, softened
1 1/2 lbs. powdered sugar
1/4 tsp. salt
2 tsps. pure vanilla extract


Preheat the oven to 350 degrees F.  Spray two round 10" cake pans (preferably 2" deep) with non-stick spray.
Blend together the shortening and sugar.  Set aside.  Sift together the flour and salt.  Set aside. Mix the eggs, buttermilk, vanilla, baking soda, and vinegar in a separate bowl.

Alternate adding the flour mixture and the buttermilk mixture to the shortening mixture in the mixing bowl, mixing after each addition.  In a small bowl, mix the red food coloring and cocoa powder.

Pour into the mixing bowl.

Mix until just combined.  Don't overbeat

Pour the batter evenly into the cake pans and bake for 25 minutes, or until a toothpick comes out  clean.  Allow to cool in the pan for 20 minutes before removing the cakes from the pans.  Cool completely before icing.

ICING:
Place the cream cheese and butter in a mixing bowl and whip until smooth.  Sift the powdered sugar and add it to the bowl.  Add the salt and mix.  Add the vanilla and mix until smooth.  I completely forgot to take pictures of making the icing.  It happened so fast because it's really quick and simple to make.

Place one layer face down on cake plate.

Plop a large spoonful of icing in the center of the layer.  Using an offset spatula, spread one-third of the icing evenly on top of one layer, making sure to get the icing all the way to the edges.

Place the other cake layer on top, face down.  (As you can see, I didn't follow directions, I didn't spread the icing on the first layer all the way to the ends).

Ice the top.

And ice the sides with the remaining icing, being careful not to loosen crumbs as you go (yeah right, that's a challenge!)

Refrigerate the cake for 20 minutes before cutting and serving to keep the icing soft yet firm.

This cake was really hard to cut into because it looked so pretty all dressed up in icing but to show the beautiful red color on the inside made it all worth it.  This cake was a hit!  The cream cheese icing was so good, I think I'll use it on every cake I make from now on!  ~isavortheweekend
Related Posts Plugin for WordPress, Blogger...